How to Compress a Batch of Images with TinyPNG
Compress a batch of images with TinyPNG using its 20-image free session, download the results, and separate compression from paid format conversion.
On this page
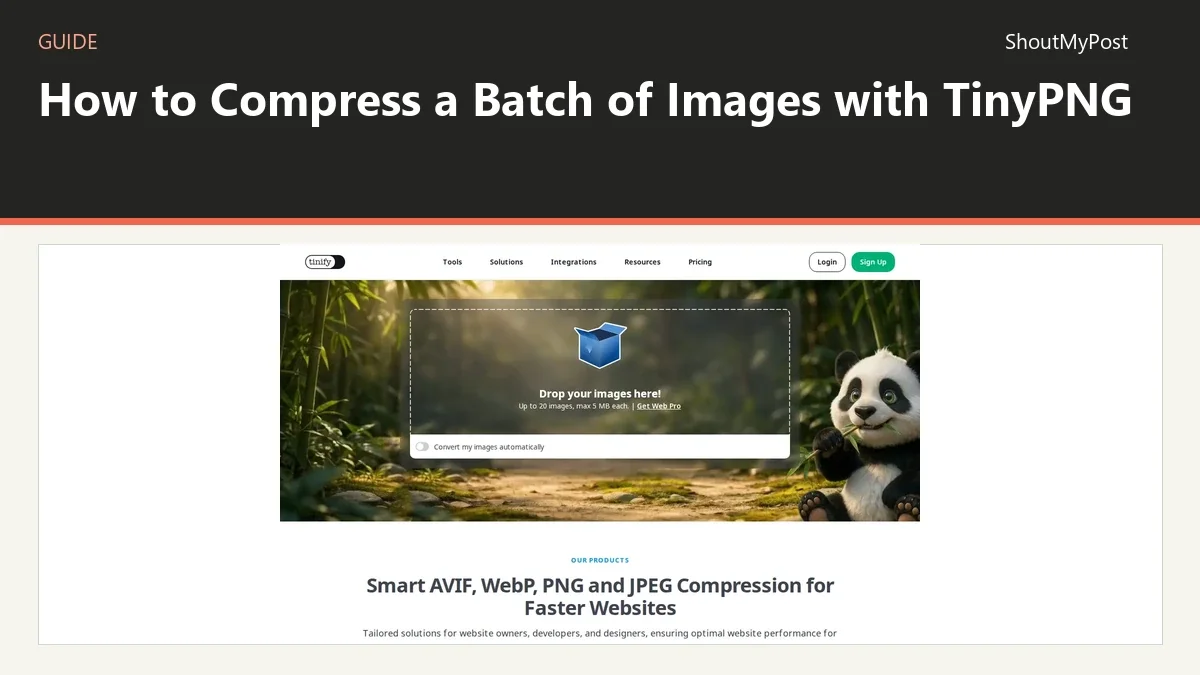
You can compress a batch of images with TinyPNG by dropping the files into its web tool and downloading the completed results. The free session accepts 20 images at up to 5 MB each. Gather the exported images you want to publish; keep the original files in a separate folder.
Compress a batch of images with TinyPNG: the free limit
TinyPNG's free limit counts images per session. It doesn't mean you can upload one 100 MB file because twenty smaller files would add up to that size. Each image must fit the 5 MB cap. The current tool accepts AVIF, WebP, PNG, and JPEG.
Compression and format conversion also have different limits. The Web pricing page lists 20 free compressions and three free conversions per session. Web Pro raises compression to unlimited with a 75 MB per-image cap, but still lists three conversions per session. Web Ultra raises the cap to 150 MB and includes unlimited conversions.
My pick for a small article is the free upload. Paying for Pro makes more sense when the file count or file size actually blocks the job. A bigger plan doesn't make a finished illustration editable; you still need the source document that produced it.
1. Prepare a folder of delivery images
Start with the images exported for the page you're publishing. A collection might include a cover, two screenshots, and a diagram. Put those copies in a folder called something like article-images-to-compress. Keep layered project files elsewhere; TinyPNG is for image delivery files.
Check the dimensions before uploading. Compression reduces file weight, while resizing changes the number of pixels. If a screenshot is twice as wide as the site needs, export an appropriately sized copy first. Photopea and GIMP can handle editing before compression; this guide starts after that stage.
2. Split the free upload into groups of twenty
Select no more than 20 supported images for a free session. Look for any file over 5 MB and set it aside before dropping the group. You can make a smaller export of that file, or use a paid Web plan whose per-image cap covers it.
Avoid mixing three unrelated articles in one batch if their filenames are vague. Compression doesn't provide the editorial context behind image1.png. Naming the files after the subject before uploading also makes the downloaded results easier to place in your content manager.
3. Drop the files into the web tool
Open TinyPNG and drag the selected files onto the upload area. The page's instruction is Drop your images here!. You can also click that area to choose files. The upload list shows the images being processed and their completed size savings.
Wait for the individual rows to finish. A completed row gives you a result for that image; an error on another row doesn't turn the entire selection into a successful batch. Keep the source folder open so you can match a failed row with the original filename.
4. Download the completed images
Use the row's download link for an individual image, or Download all for the finished group. The batch download collects the results, so extract the archive into a new folder such as article-images-compressed. That folder now holds the versions intended for publishing.
Check that its filenames match the source group. If nineteen files arrived from a selection of twenty, return to the page and find the missing row. A smaller archive is only good news when it contains every image needed by the article.
5. Inspect the images at their final size
Open the cover and screenshots at the width readers will see. Inspect small text in interface screenshots, fine lines in diagrams, and gradients in illustrations. My preference is to keep the original export beside the compressed copy during this check, so replacing one doesn't erase the other.
Don't treat a percentage saved as a quality score. A file with little reduction can still be the right one to publish. Some exports are already compressed, while a different image offers more room for reduction. Judge the result by the visible image and its final file size.
Known problems and fixes
Tinify's official pricing FAQ covers a paid account that still hits free upload limits. Its fix is to sign in on the web tool; the name and crown icon should appear at the top right. Buying API capacity doesn't substitute for a Web subscription, because Tinify sells those as separate products.
The free per-file cap also stops oversized uploads. Re-export that image at the actual site dimensions before trying again. If the full dimensions are needed, choose a Web plan that explicitly allows its size. For a local compression option, Squoosh works on an image without the TinyPNG upload workflow.
| Problem | Cause to check | Fix |
|---|---|---|
| A file is rejected | It exceeds the plan's per-image cap | Resize or use a Web tier covering that size |
| A paid user gets free limits | The web tool isn't signed in | Sign in and look for the account name and crown |
| Conversion stops before compression does | The plan has a separate conversion allowance | Keep the format or use the conversion tier you need |
Two variations
For a screenshot-heavy guide, export all screenshots to one supported format before uploading. That lets the compression batch concentrate on reducing weight, with no need to spend conversion slots merely to make the folder consistent. Keep filenames tied to the step each screenshot shows.
For a product-photo collection, keep the original-resolution archive separate from the web versions. TinyPNG can process the delivery images after the crop and dimensions are approved. If a later page needs a larger photograph, return to the original and make a new export instead of enlarging the compressed copy.
Completion checklist
- Every selected image completed without an upload error.
- The extracted download contains the expected file count.
- Screenshots remain readable at the publishing width.
- Original exports remain available for future edits.
FAQ
How much does TinyPNG Web Pro cost?
TinyPNG Web Pro is shown at $3.25 per month billed annually on the pricing page checked October 9, 2026. That is a Web subscription for the online optimizer. The page lists unlimited compressions and a 75 MB per-image cap, while format conversions remain limited to three per session on that tier.
Does TinyPNG give paid users a different compression algorithm?
Tinify says the compression algorithm is the same for free and paid Web users. The subscription changes capacity and other plan features, so a free session can help you assess the actual image output. Use the file size and the visible result to judge a batch before deciding whether its volume calls for a subscription.
Does the Web subscription include API compression?
The Web subscription and Developer API have separate pricing pages. Buy the Web plan for the drag-and-drop online optimizer, and review API pricing if a script or integration will send the images. Keeping those two jobs separate avoids paying for a capacity increase that doesn't affect the upload tool you're using.
Next steps
Browse the image-editing directory if the images still need layout work. The wider Creative & Design section covers other design tools. If the next step is placing the finished images in a publishing system, WordPress is one option with its own media workflow.
Sources
TinyPNG's online compressor supplies the upload and download controls. Tinify's Web pricing table and FAQ supply the plan limits, billing terms, and account troubleshooting. Checked October 9, 2026.
Related articles
Directory
Listings in this article
-
TinyPNG
TinyPNG is a free online image optimizer that reduces the file size of AVIF, WEBP, JPEG and PNG images using lossy compression. The service includes a developer API, a CDN, and a WordPress plugin. The online tool accepts up to 20 images of up to 5 MB each.